

The vast majority of my interactions with you are devoted to answering your questions about my hair (for example, how I curl it or what products I use). Old Hollywood curls are one of my favorite new curling techniques, and I'm thrilled to share it with you in this post.

However, despite the fact that it appears to be extremely complicated, it is actually quite simple and can be completed much more quickly than you might anticipate.

As a result of a minor modification I made to my usual curling method recently, I almost unintentionally created my favorite hairstyle to date, which I will describe below. Is it something you'd like to learn how to do? If so, let me know. Take into consideration the following information!
How to style your hair into Hollywood curls according to the instructions.
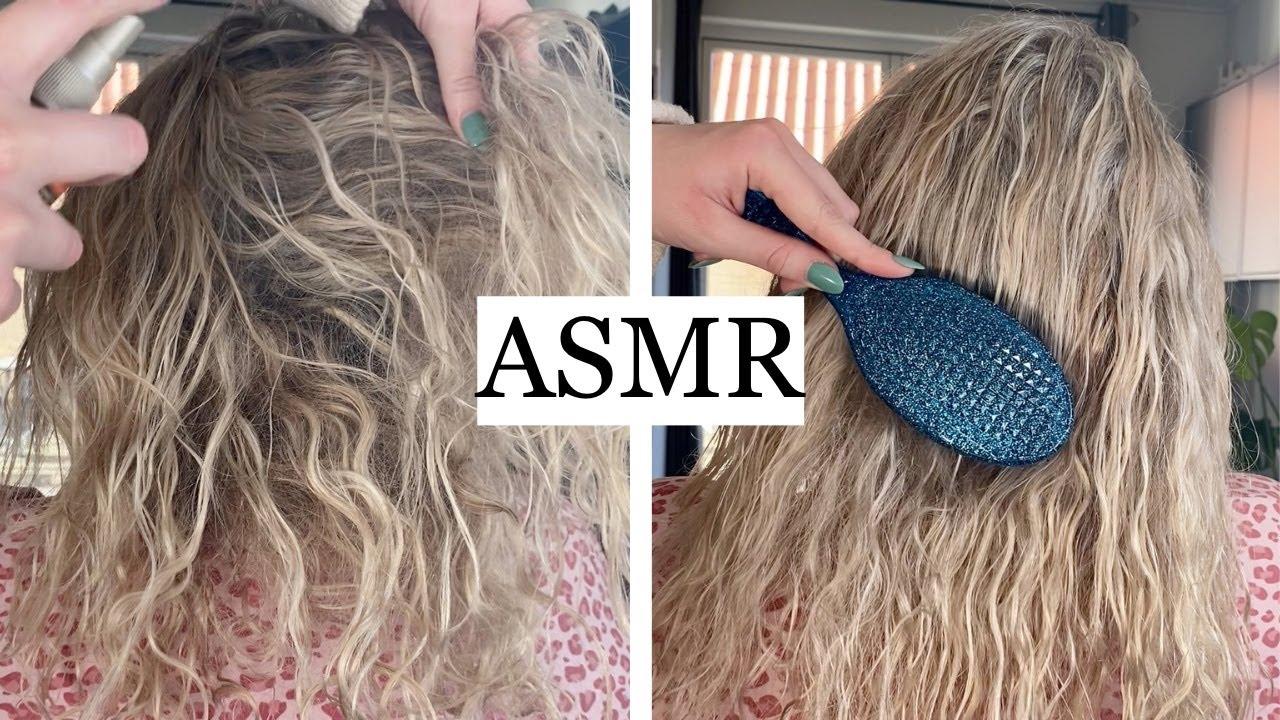
To begin, let's talk about the materials, which are the most important aspect of the discussion. You'll need a few basic tools to complete this tutorial, including a hair spray (something flexible and not too crunchy), duck bill hair clips (which are absolutely necessary–you can find them at Ulta or any beauty supply store), an anti-frizz serum (I recommend MoroccanOil), a natural bristle brush (I simply use my teasing brush), and, of course, a curling iron.
An important point to remember about curling iron size: For this tutorial, you should use a curling iron with a diameter of between 1-1.5 inches for best results. If you are under the impression that larger curls indicate the use of a larger iron, I understand that this can be misleading. However, I can assure you that this is not the case. Starting with a tight curl, we'll brush out our hair later to create big, voluminous waves. To finish, curl your hair at the back of your head in a loose manner.
One item in particular that I'd like to draw attention to is my curling iron: Xtava's 5 in 1 curling iron is by far the most versatile curling iron I have in my collection. If you're in the market for a new curling iron, I strongly advise you to purchase one from me. It is possible to create virtually any curled hairstyle you desire by using the five different barrel attachments (which include both the traditional clamp and two wands!). This eliminates the need for multiple different sized curling irons. Beachy waves, big, loose curls, and pretty much anything in between are all styles I've created with mine. All of the wands are contained in a carrying case, and a heat-resistant glove is included for use with the wands to prevent you from burning yourself on the hot surface!
As a result, even when my hair is frizzy prior to using the product, the ceramic barrels produce curls that are exceptionally glossy. When it comes to this situation, the fact that I haven't had my hair cut in more than a year is actually advantageous to me. OH MY GOD, WHAT A DAY IT HAS BEEN. The task has been added to my to-do list as a result of your suggestion. Furthermore, it has an automatic shutoff feature for people who are prone to forgetting things, such as myself, and who are at high risk of setting their home on fire.(Take a few deep breaths in and out.)
STEP #1: AFTER THE HAIR HAS BEEN THOROUGHLY BRUSHED, PREPARE IT WITH HAIR SPRAY. STEP #2: FOLLOW UP WITH HAIR SPRAY.
The number of girls who do not use hair spray before curling their hair, which is a self-explanatory practice, however, surprised me. There is a common misconception that Aquanet makes your hair crunchy and sticky; however, this was true back in the 1980s when Aquanet was first introduced. Instead of using a heavy or medium hold, turn your head upside down and thoroughly spray it before brushing it through once more to finish. You have a great deal of stamina and none of the negative characteristics.
In order to complete Step #2, you must curl your hands inwards toward your face.
When attempting to achieve the old Hollywood hairstyle, the most important thing to remember is to curl your hair as close to your face as possible, as shown in the photo above. Curling your waves away from your face will give your waves a loose and beachy appearance, which is exactly what you want. To achieve the best results, work with sections of hair that are the width of two fingers (or just a little wider than the width of your curling iron).
For a full curl with volume on top, clamp the iron in the middle of your strands and curl it toward your face while wrapping the ends around the bottom of the iron. Keep the clamp in place for an extra few seconds, opening and closing the clamp a couple of times to make sure you don't cause any wrinkles in the paper.
It is unclear what the purpose of holding for such a short period of time is. To achieve the beautiful waves you see, all that is required is to heat the curl to a high temperature and then cool it down again. This method of curling hair is one of the most efficient because it requires only a few seconds to curl each strand of hair and requires only a few seconds per strand.
Release and capture are the third and final steps. The Curl is a slang term for
You will need to open the clamp a few times while holding the curling iron vertically to release the curl (you will need to do this a few times). In your other hand, take the curl in your hand and grip it with the palm of your hand.(It's going to be extremely hot today.)To keep things moving, take a deep breath and hold on a second!)
You are in possession of the pin curl that you are currently holding in your hand in your right hand. Twist your wrist in a horizontal direction, allowing it to roll up against the back of your neck. Clamp it in place for a few minutes with a hair clip to ensure that it cools completely before moving on. Every time you look at your hair, it should appear as though you are styling it with a curling iron.