

Ahh.
Vacuum cleaners— what would we do without them? One of the best and high-end manufacturers of powerful vacuum cleaners is Shark.
However, regardless of how high-end your vacuum cleaner is, it can be worthless over time if you do not ensure proper maintenance. Stop for a moment and think about what a vacuum cleaner does for you.
It absorbs and sucks a large volume of dirt, debris, dust, pet dander, and small particles that would otherwise make your home very dirty. Such accumulation gives your vacuum cleaner prone to clogging or losing its efficiency. Read Here: Shark Vacuum Won’t Turn On – How To Fix It
One of the most common things you can do to increase your Shark vacuum’s lifespan and efficiency is regularly emptying and cleaning its dirt bin.
Considering the importance, in this article, we’re going to explain when and how to empty Shark Vacuum cleaners.
When To Empty And Clean Shark Vacuum Cleaners?
This will depend on how frequently the user uses the Shark vacuum cleaner as well as how clean or dusty your home can be. So, it wouldn’t be useful to tell you to empty your vacuum cleaner on a monthly or weekly basis.
However, a useful feature of the Shark vacuum cleaner is that they have an indicator when it is time to empty the dirt bin. Check the label for the indicator light, usually turning red when it has reached the maximum level of accumulated dirt or dust.
For the cordless Shark vacuum cleaner, it features clear or transparent dirt canister with lines, so you can better see when it’s time to empty the canister.
Now, if you have one of the old models without an indicator, then there are signs that will tell you when the dirtbag is already full and it is time to empty the vacuum cleaner:
How To Empty Shark Vacuum?
1) Unplug the Device
First off, you need to ensure that the Shark vacuum cleaner is disconnected or unplugged from the outlet. If you have the Cordless Shark vacuum cleaners, then make sure to remove the battery. After that, find a spacious place for cleaning and emptying the vacuum cleaner.
2) Opening The Device
The opening features of Shark vacuum cleaners may vary by model. In general, you only need to open the bin, hold the handle that is adjacent to the bin, and grasping it open.
3) Separating the Dust Container
Once you opened your device, you should be able to see the dirt bin or dust container. Remove it from the device.
4) Removing the Pre-Motor Filters
Most Shark vacuum cleaners will come with pre-motor filters. Since they’re already out, perhaps you’d also like to clean them up to further optimize the performance of your vacuum cleaner.
If you’re unsure of how to clean the filter, check for the user’s manual.
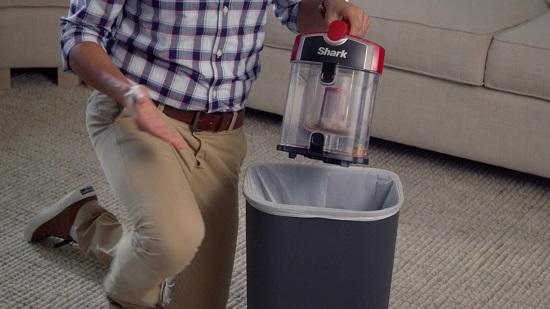
5) Emptying The Canister
After removing the filter, you need to pull out the bin. Press the button near the bin, then using the handle, pull it out from the device. Empty the debris and dust into the trash can.
After that, you can use clean water in order to remove all sorts of dirt and dust from the canister and its filtration system. Make sure to rinse it by putting it under running water.
6) Air-Drying
After cleaning the canister and its filtration system, allow it to air dry for at least 24 hours.
Do not try to put the dust container and filtration system back into the vacuum cleaner while wet. Otherwise, mold and mildew can grow and cause strong musty odor when using the vacuum cleaner.
Once dry, you can finally put it back into the vacuum cleaner.
Tips For Cleaning Different Shark Vacuum Models
As there are a wide variety of Shark vacuum models, the procedure for cleaning can vary from one another. Thus, you may need to pay closer attention to what you use and how to properly empty and clean the parts of your device.